Cinewhoop vs Freestyle Quad: Which One You Actually Want
The honest answer to cinewhoop vs freestyle quad is that they are not rivals —…
A cinewhoop is a ducted FPV quad built for smooth, close-up footage rather than speed. The props sit fully inside guards, so it can fly within a meter of people and objects safely, usually on 2.5 to 3.5-inch props and a 4S or 6S LiPo. Expect 3 to 5 minutes of flight and footage steady enough to pass for a gimbal.
I fly both halves of this hobby — sub-250g camera drones for the Nordic landscape light, and FPV quads I build and rebuild at my own bench. The cinewhoop is the bridge between them. It flies in the headset like an FPV machine but produces footage with the calm of a camera drone, which is exactly why it earned a permanent spot in my bag after my first winter of indoor whoop sessions. This guide is the whole picture: what a cinewhoop is, how it differs from a freestyle quad, how to choose or build one, the camera and battery decisions that actually matter, and the rules I fly it under here in Sweden.
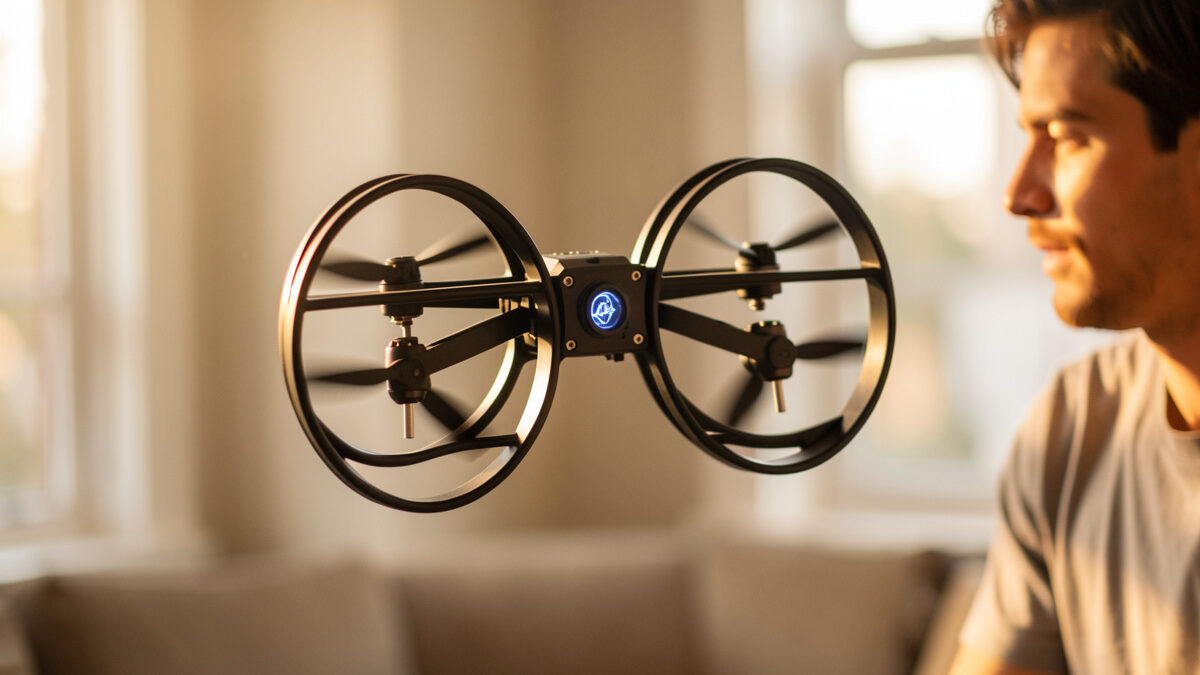
A cinewhoop is a small FPV multirotor whose propellers are completely enclosed by ducts — circular shrouds that surround each prop. The ducts do two jobs: they protect the props (and anything the quad bumps into), and at low speed they add a little static thrust. That combination is the whole point. You get a machine you can fly indoors, through doorways, and right past a person’s shoulder without turning a propeller into a problem.
The term came out of the community around 2019 and has stuck to a specific recipe: ducted, camera-carrying, tuned for slow and smooth. Most cinewhoops run 2.5-inch to 3.5-inch props, weigh somewhere between 250 and 450 grams all-up with a camera and battery, and are deliberately set up — in software and in build choices — to resist the snappy, twitchy behaviour a freestyle pilot wants. Where a freestyle quad rewards aggression, a cinewhoop rewards a soft hand on the sticks.
The trade is honest: those ducts cost you top speed, efficiency, and flight time. A cinewhoop is not fast and it does not fly long. What it gives back is the ability to put a camera somewhere a gimbal drone physically cannot go — through a gap, under a table, alongside a moving subject — and come back with usable, stabilised footage.
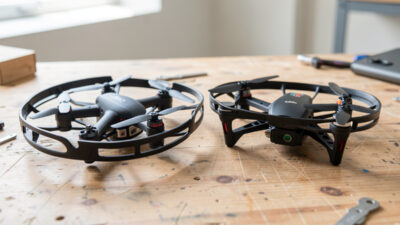
The three categories beginners confuse most are tinywhoops, cinewhoops, and freestyle quads. They overlap in parts but solve different problems. A tinywhoop is a tiny ducted indoor trainer on 1 to 2-inch props that usually carries no real camera. A freestyle quad is an open-prop 5-inch acro machine for tricks and speed outdoors. A cinewhoop sits in the middle: ducted like a whoop for safety, but big enough and powerful enough to lift a proper action camera and hold a smooth line.
I tell people to think of it by what comes home on the SD card. The tinywhoop teaches you to fly in the headset for the cost of a nice dinner. The freestyle quad makes you grin. The cinewhoop is the one that puts a paid-looking shot in your edit. If your goal is footage you would actually use, the cinewhoop is the machine — but it is not where you should start your stick time. That still begins on a simulator and a tinywhoop.
For a side-by-side breakdown of handling, parts, and what each one is genuinely good at, I wrote a dedicated cinewhoop vs freestyle quad comparison. The short version: they are not competitors, they are two different cameras you reach for on different days.
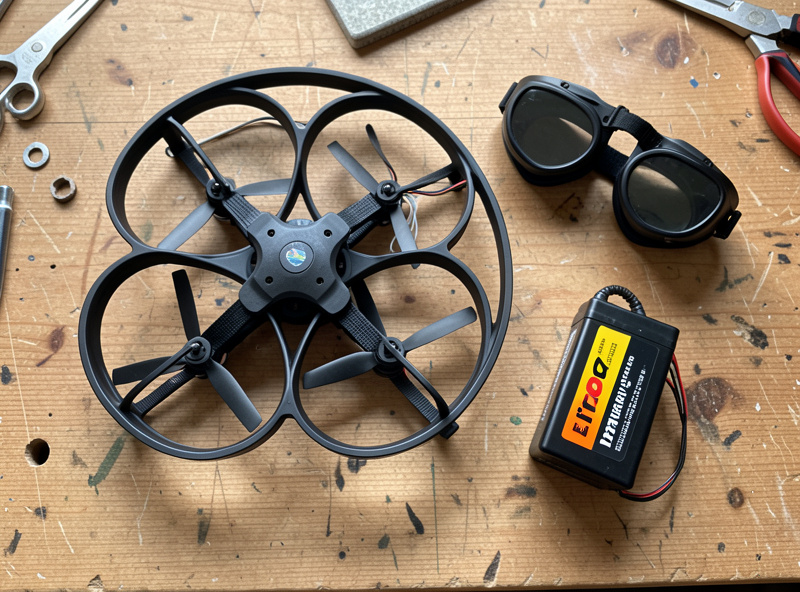
Under the ducts a cinewhoop is the same family of parts as any FPV quad: a frame, four motors, a flight controller and ESC stack running Betaflight, a video transmitter and camera for the headset feed, a radio receiver, and a LiPo. The differences are all about mass and protection. Cinewhoop motors are chosen for torque to haul the extra duct weight and the camera, not for screaming RPM. The frame is built around the ducts rather than around crash survival.
Sizing is the first decision, and it drives everything else. The table below is how I think about the common classes when someone asks me what to buy or build.
| Class | Prop size | Typical all-up weight | Battery | Best for |
|---|---|---|---|---|
| Sub-250 micro cinewhoop | 2 to 2.5 inch | Under 250 g | 3S or 4S, 450–650 mAh | Tight indoor work, lighter rules |
| Standard 3-inch cinewhoop | 3 inch | 250–380 g | 4S, 650–1100 mAh | The all-rounder; most people’s pick |
| 3.5-inch cinewhoop | 3.5 inch | 350–450 g | 4S or 6S, 850–1300 mAh | Heavier cameras, outdoor proximity |
| 6S “cinelifter” style | 3.5 to 4 inch | 450 g and up | 6S, 1100 mAh+ | Full-size cameras, longer lines |
My own bench machine is a 3.5-inch cinewhoop-class build, and a standard 3-inch is what I recommend to almost everyone first. It carries a naked action camera, fits through a normal doorway, and is forgiving enough that a duct strike against a wall ends the clip rather than the flight. If you want the full rundown of frames worth building on this year, I keep a current list of the best cinewhoop frames for 2026.
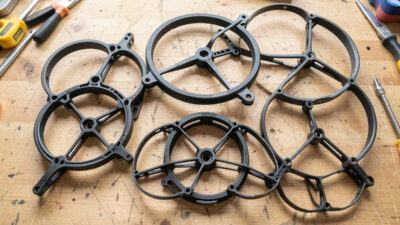
The single feature that defines a cinewhoop is its prop protection, and it is also the feature beginners most often compromise to save weight. Do not. The ducts are not an accessory bolted to a quad — they are the reason you are allowed to fly this thing where you want to fly it. A cinewhoop with damaged or removed guards is just a heavy, slow, inefficient freestyle quad with none of the safety that justified the trade.
Ducts also change the aerodynamics in ways that matter to a pilot. They add static thrust at a hover, which is part of why a cinewhoop feels planted and smooth. They also create their own turbulence and cost efficiency, which is part of why flight times are short. Understanding that bargain is most of understanding the aircraft, and I go deep on it in my cinewhoop propguard importance guide.
You have two honest paths: buy a ready-to-fly or bind-and-fly cinewhoop, or build one from parts. For a true beginner who already has goggles and a radio, a bind-and-fly is the faster route to footage and I do not sneer at it. You skip the soldering, you get a tuned machine, and you learn what you actually want before you spend on a build.
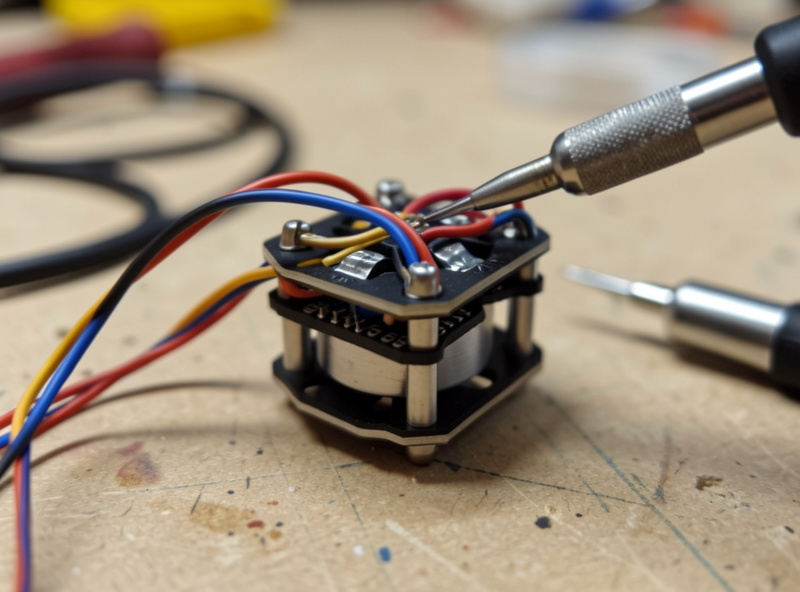
But building teaches you the aircraft in a way buying never will, and the cinewhoop is a forgiving first build because the ducts protect your mistakes. If you have done a 5-inch build or even watched one closely, a cinewhoop is well within reach. The soldering is the same craft — FC and ESC pads, motor leads, the VTX — just in a tighter space. I walk the whole process, in build order, in my cinewhoop build guide for beginners, and the bench-skill side lives in my soldering order guide.
Whichever path you take, the rule is the same one I apply to every quad on my bench: do not arm it outdoors until you have logged real simulator hours and a clean first-arm check. The sim is the cheapest crash insurance ever sold, and the first-arm checklist exists because excitement is the most common cause of a new pilot’s first crash.
A cinewhoop is only as good as what it carries, and here my lens bench does the talking. There are three common camera approaches and they suit different pilots. A full action camera (a current GoPro or DJI Action) mounted on top gives you the best image and in-camera stabilisation, at a weight cost. A “naked” action camera — the same sensor and lens stripped of its waterproof case to save weight — is the classic cinewhoop choice and what most serious footage is shot on. The third path is an onboard HD FPV system that records to the air unit, which is lighter and simpler but historically a step behind a dedicated camera on image quality.
The thing I judge a drone camera on is the same thing I judge any lens on: sensor size, what the optics actually resolve, and how the footage holds up once you stabilise it. The propellers are just a very expensive tripod. For the deeper image-quality reasoning — sensor sizes, bitrate, why a bigger sensor earns its weight — I keep that on my drone camera guide. The cinewhoop-specific advice on framing, ND filters, and getting the smooth look out of the machine is in my filming techniques for cinewhoop piece.
Be honest with yourself about flight time before you buy: a 3-inch cinewhoop on a 4S 850 mAh pack gives me roughly 3 to 4 minutes of useful filming, and a heavier 6S setup with a big camera is often less. The ducts and the camera both eat into it. This is not a long-range aircraft, and chasing flight time with a giant pack usually just adds weight that cancels the gain.
The battery choice is a real decision — voltage (4S vs 6S), capacity, and C-rating all change how the quad flies and how long it lasts. I lay out how I pick packs for ducted quads in my cinewhoop battery choice guide. What I will say here, and everywhere, is that the pack you choose matters far less than how you treat it.
LiPo care on a cinewhoop is the same adult discipline I apply to every pack I own: charge on a proper balance charger, store at a storage charge of around 3.8 volts per cell rather than full, transport in a LiPo bag, and retire any pack that puffs — puffed means dead, no heroics. I never modify packs, and neither should you. The full habit set is in my LiPo battery care guide and the specifics of storage charge and balance charging.
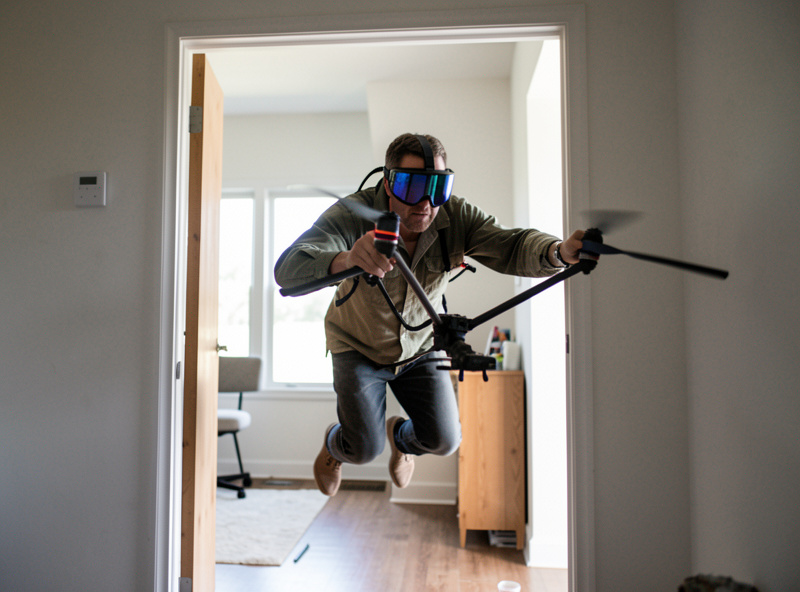
A cinewhoop flies differently from anything else in the bag, and the adjustment trips up freestyle pilots most. It is heavier and slower to change direction, so you lead your movements and let momentum do the work. The smoothness you see in good cinewhoop footage is not a setting — it is a soft, slow, anticipatory hand on the sticks. You fly the shot, not the quad.
Indoors is where the cinewhoop earns its keep, and it is also where the most beginners crash, because confined spaces punish twitchy inputs and prop wash bounces back off the floor and walls. I cover the specific technique — managing wash, planning the line, dealing with light — in my guide to flying a cinewhoop indoors. The general FPV groundwork, sim hours and all, starts at my FPV entry path.
I fly in the EU, under the open category, and I treat the rules as part of the craft rather than an inconvenience. Two facts matter most for cinewhoop pilots. First, weight: most cinewhoops exceed 250 grams, which puts them outside the lightest sub-250 bracket and into subcategories that restrict how close you can fly to uninvolved people. A sub-250 micro cinewhoop is the exception and is part of why that class exists. Second, registration: in the EU, if your drone carries a camera you must register as an operator before you fly it, regardless of weight (toys aside). A cinewhoop always has a camera, so you always register.
I am an EU operator describing the rules I personally fly under, not giving you legal advice, and rules change — check your national aviation authority and the current EASA framework before you fly. There is also a privacy dimension when you film near people that is separate from aviation rules and worth taking seriously. For the weight-class logic specifically, my EU registration explainer and my why 250 grams matters piece cover the line and why it is drawn where it is.
You will hit things with a cinewhoop — that is the job. The good news is the ducts take most of the abuse, and a cinewhoop crash is usually cheaper than a freestyle crash. The common repairs are cracked or chipped ducts, a popped motor lead, and the occasional bent prop. My standard triage order after any impact is the same: disarm, inspect props and ducts, check motors spin clean by hand, look for loose or torn solder joints, and only then re-arm in a safe spot.
The repair skills carry straight over from the rest of FPV. A snapped duct or arm is a frame job; a dead motor is a swap and solder. I keep the full diagnostic sequence in my FPV crash repair guide, and the bench fixes in my motor replacement and broken arm repair guides. Spare ducts and props live in my field bag permanently — on a cinewhoop they are consumables, not spares.
A cinewhoop is a forgiving aircraft because the ducts protect both the props and what it hits, but it should not be your first flying experience. Start stick time on a simulator and a tinywhoop, then move to a cinewhoop once you can hold a stable hover and line in the headset.
Expect roughly 3 to 5 minutes of useful flight. A 3-inch cinewhoop on a 4S 850 mAh pack lands around 3 to 4 minutes, and heavier 6S builds carrying a full camera are often less. The ducts and camera both cut into flight time, so plan your shots before you arm.
No, but a dedicated action camera gives the best image. Many pilots fly a naked GoPro, which is the same sensor stripped of its case to save weight, while lighter builds use an onboard HD FPV system that records to the air unit. The bigger the sensor, the better the footage holds up after stabilisation.
A cinewhoop has fully ducted props for safe, smooth flight close to people and objects, while a freestyle quad has open 5-inch props for speed and acro outdoors. The cinewhoop trades agility and flight time for protection and stable footage. They are different tools, not competitors.
Yes, indoor flying is exactly what a cinewhoop is built for. The ducts let you fly within a meter of walls, furniture, and people. Confined spaces are unforgiving of twitchy inputs and prop wash bounces back off floors, so fly slow and lead your movements with a soft hand on the sticks.
In the EU, any drone carrying a camera requires you to register as an operator before flying, regardless of weight. A cinewhoop always has a camera, so you always register. Most cinewhoops also exceed 250 grams, which restricts how close you can fly to uninvolved people. Always check your national authority.
The ducts that make a cinewhoop safe also cost efficiency, and the camera adds weight. Both shorten flight time. Fitting a larger battery often just adds weight that cancels the gain, so most pilots accept 3 to 5 minutes and plan their shots rather than chasing endurance.
The honest answer to cinewhoop vs freestyle quad is that they are not rivals —…
The best cinewhoop frame in 2026 is the one matched to your prop size, camera,…
Leave a Reply