FPV Motor Replacement Guide: Test, Swap, and Solder
Replacing an FPV motor is a 30-minute job: confirm the motor is actually dead, match…
FPV frame repair is mostly about knowing the line between a fixable frame and a retired one, then reinforcing the rebuild so the same part does not break again. A cracked arm or a stripped standoff thread is a repair; a delaminated carbon plate is a retirement. The single highest-value reinforcement is moving to thicker arms, because arm thickness is the biggest predictor of crash survival on a 5-inch quad.
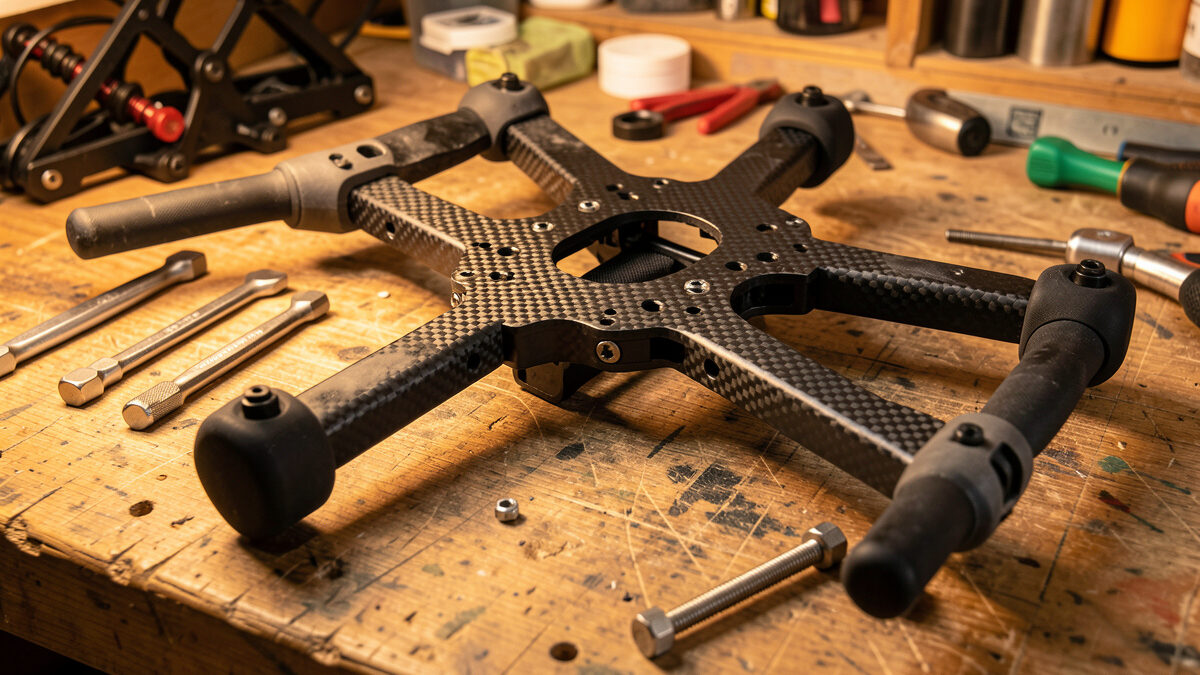
The frame is the skeleton everything else bolts to, and after enough crashes you learn it fails in the same predictable places. Rather than rebuilding identically and waiting for the same break, I treat every frame repair as a chance to reinforce the weak point that caused it. This guide covers what is genuinely repairable, the reinforcement tricks that hold up, and how to choose a frame that survives your flying style instead of fighting it.
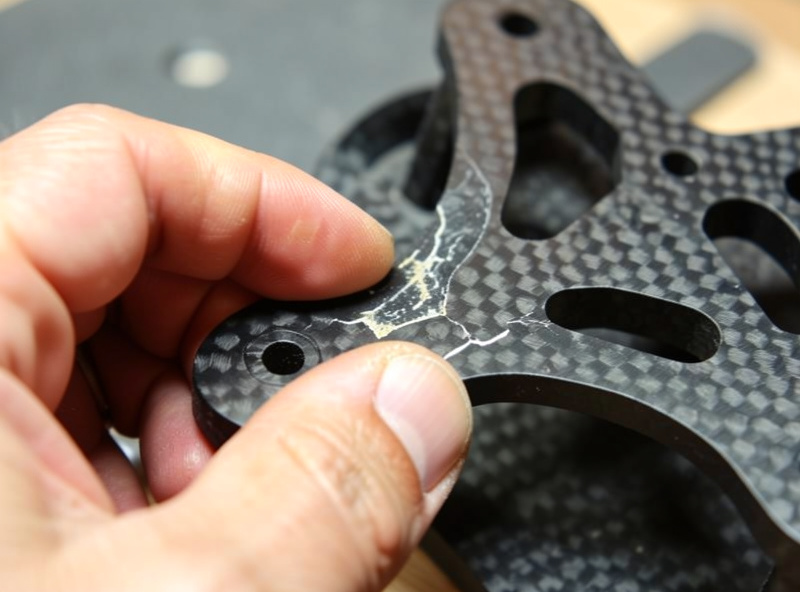
The retirement test for carbon is delamination. Sound carbon fiber is rigid and rings slightly when tapped; delaminated carbon — where the layers have separated from fatigue or a hard hit — feels soft, flexes where it should not, and never flies true again. A frame with a delaminated main plate is done, no matter how intact it looks from across the room.
Everything short of delamination is usually repairable. A cracked arm on a replaceable-arm frame is a bolt-out swap, a stripped standoff thread can be re-tapped or replaced, and a bent or sheared bolt comes out and gets renewed. The judgment call is the main center plates: if they are cracked through a mounting hole or delaminated, retire them; if they have only surface scoring, they are fine. Run the same flex and tap test on every plate that the broken arm repair guide uses on arms — flex reveals cracks that the eye misses, and a tap that sounds dull instead of sharp warns of delamination. When in doubt on a structural plate, replace it; the plate holds your motors to the quad.
Not every reinforcement trick is worth doing, and a couple are actively counterproductive. The ones that hold up address real stress points: thicker arms, rounded inner corners, thread-locked hardware, and TPU bumpers that absorb impact energy. The ones to skip are heavy epoxy slathering and rigid additions that just move the stress to a new weak point.
Here is how the common reinforcement options compare in my experience.
| Method | What it does | Worth it? |
|---|---|---|
| Thicker arms (5mm/6mm) | Dramatically raises impact survival | Yes — biggest single gain |
| Round sharp inner corners | Removes crack-start stress points | Yes — quick and free |
| Thread locker on all bolts | Stops vibration loosening | Yes — essential |
| TPU corner/arm bumpers | Absorbs and spreads impact | Yes — light and effective |
| Epoxy over a cracked arm | Adds brittle, heavy mass | No — fails and unbalances |
| Rigid arm braces | Moves stress to a new point | Rarely — often makes it worse |
The pattern is clear: reinforce by removing stress concentrations and absorbing energy, not by gluing mass onto a part that is already failing.
If one arm keeps snapping in the same place, the answer is thicker arms, not stronger glue. Going from a 4mm to a 5mm or 6mm arm is the single most effective change you can make to a crash-prone 5-inch, because arm thickness scales impact resistance steeply. Many frames sell thicker replacement arms specifically for pilots who break the stock ones.
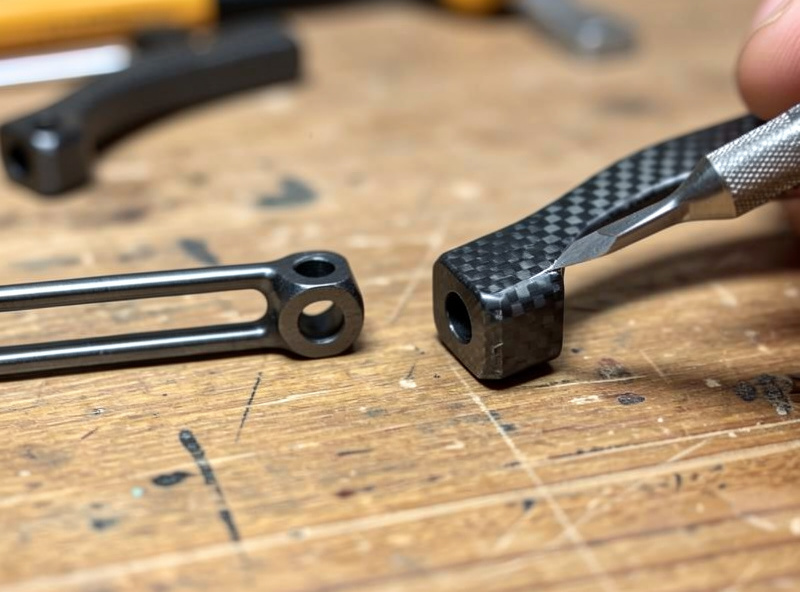
Beyond thickness, two free tweaks help: round any sharp inner corner where the arm meets the body with a fine file, because sharp corners are exactly where cracks start, and add a small TPU bumper at the arm tip to spread impact rather than concentrate it on the carbon. A repeated break in the same spot is the frame telling you the arm is under-specified for your style — listen to it and step up the thickness. This ties directly to the broken arm repair guide, where the goal is to stop replacing the same arm every weekend, and it is exactly the kind of preventable expense in my beginner mistakes piece.
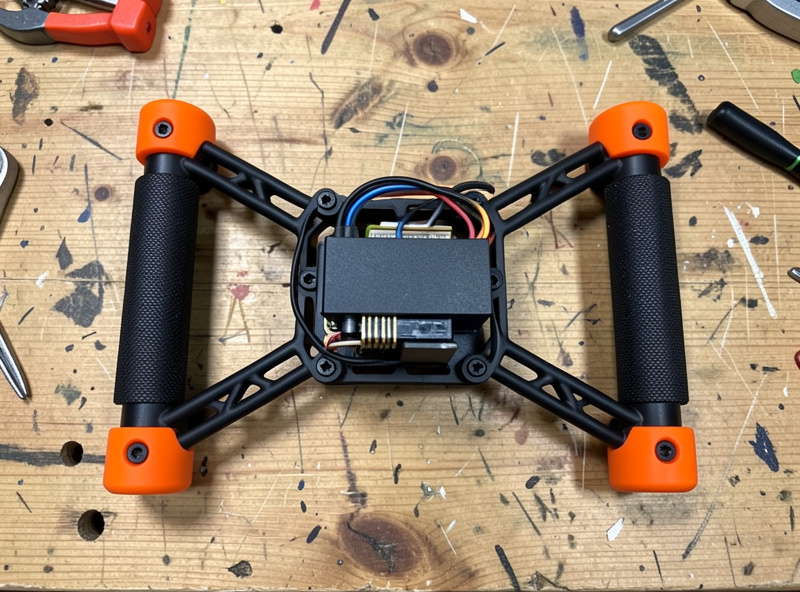
The electronics stack survives crashes because of how it is mounted, and a few cheap habits keep it that way. Soft rubber grommets isolate the FC from vibration and shock, thread locker keeps standoffs from backing out, and replacing bent aluminum standoffs with fresh ones prevents a wobbly stack that cracks solder joints over time. A loose stack is a slow killer of solder joints.
When you rebuild, inspect every standoff for bends and strip — a standoff that took an impact is often subtly bent, which pre-loads the stack and works the joints loose in flight. Replace bent standoffs rather than reusing them, keep the soft mounts in good shape, and torque the stack bolts firm but not crushing so the grommets can still do their job. Protecting the stack mechanically is the cheapest way to avoid the much bigger job of a stack replacement or chasing the cracked joints covered in my soldering repair guide. A stable stack is a stack that does not develop intermittent faults.
Sometimes the real fix is a different frame. If you are constantly repairing the same airframe, you are likely flying a frame too light for your style. Durable freestyle frames — the Armattan-class and TBS Source One-style builds I keep going back to on my own bench — use thicker arms, true replaceable-arm construction, and a layout that protects the electronics — and choosing one of those over a featherweight racing frame is a repair decision made before the crash.
Look for replaceable arms (so a break is a $6 part, not a new frame), arm thickness suited to how hard you fly, and a stack mounting area that shields the FC and ESC. A slightly heavier, tougher frame costs you a fraction of your flight time but saves you repeated rebuilds, and for freestyle that trade is almost always worth it. The frame is the one component where buying for durability up front pays back every single crash, which is the same long-game thinking behind buying good tools early, as I argue in the FPV entry path guide.
Frames do not only fail at the carbon — the hardware fails just as often and is cheaper to prevent. Stripped bolt heads, cross-threaded screws, and lost nylon hardware strand more rebuilds than cracked plates do. The fix is keeping a small hardware kit of the exact M2 and M3 screws, lock nuts, and standoffs your frame uses, because a single missing $0.10 screw grounds the whole quad.
Two habits keep the hardware healthy. First, use the correct driver — a worn or wrong-size hex driver rounds out bolt heads, and a rounded head on a structural screw is a genuinely annoying extraction job. Second, never reuse a screw that fought you going in; carbon dust and thread wear mean a screw that cross-threaded once will strip the hole next time. I keep a labeled box of frame hardware on the bench so a stripped screw is a ten-second swap, not a parts order, the same way I keep spare arms and a matched motor on hand. Match the screw length carefully too, because a frame screw that is slightly too long can bottom out before it clamps, leaving a stack that feels tight but is not actually held.
Sometimes a frame cracks away from the bench and you want to salvage the session safely. The honest rule is the same as for arms: a field fix is for getting gentle cruising footage on damage that is still structurally attached, never for restoring a clean break to full-send freestyle. A zip tie or a tight tape wrap can stabilize a cracked plate enough to cruise it down; nothing glued in the field should be trusted at throttle.
What I carry for field repairs is minimal and effective: a few zip ties, a roll of fiber-reinforced tape, a spare arm, and the multi-tool that fits my frame’s hardware. A zip tie can cinch a loosened stack, tape can baby a hairline crack home, and a spare arm turns a snapped arm into a twenty-minute fix on the tailgate. But a delaminated or fully cracked structural plate is a session-ender — pack it up and rebuild properly at the bench, because flying a compromised main plate risks the plate failing and releasing a motor at speed. The judgment of what is cruise-home damage versus pack-it-up damage is the same instinct that runs through the whole crash repair process.
Most catastrophic frame failures are preventable with a 60-second pre-flight check. Before each session I run a hand over every arm and plate feeling for flex, check that no bolts have backed out, and confirm the stack is snug. A crack caught on the bench is a repair; the same crack caught at full throttle is a crash and a thrown prop.
Make the check a ritual. Flex each arm, tug each motor to confirm its bolts are tight, glance at the standoffs, and confirm the props are sound. Carbon fails progressively — a hairline crack grows over several flights before it lets go — so the pilot who inspects regularly catches the failure as a cheap fix while the pilot who does not catches it as a crash. This is the same preventive mindset as the LiPo discipline in my battery care guide: small habits on the bench prevent expensive failures in the air.
Keep building: a reinforced frame is one piece of the bigger repair picture. Start from the FPV crash repair guide for the full triage-to-rebuild map, pair this with the broken arm repair walkthrough to stop the same arm snapping, lean on the soldering repair guide for the joints a rebuild touches, and protect the brains with the FC stack replacement guide. Build the frame tough, inspect it often, and most crashes become a weeknight fix instead of a new quad.
Replacing an FPV motor is a 30-minute job: confirm the motor is actually dead, match…
An FPV repair starts before the soldering iron: triage the crash first, then fix what…
Replacing an FPV flight controller stack is the repair people fear most, but it is…
Leave a Reply