FPV Frame Repair and Reinforcement: Build It Tougher
FPV frame repair is mostly about knowing the line between a fixable frame and a…
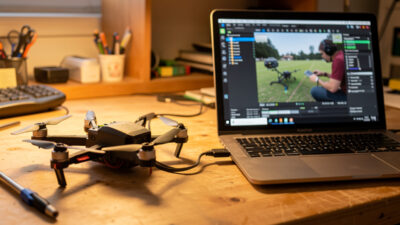
Replacing an FPV flight controller stack is the repair people fear most, but it is mostly careful documentation, not advanced soldering. Photograph every wire before you desolder, match the new board’s mounting pattern and voltage rating, transfer the wiring one pad at a time, and restore your Betaflight config from a saved dump. A replacement stack runs about $35 to $60.
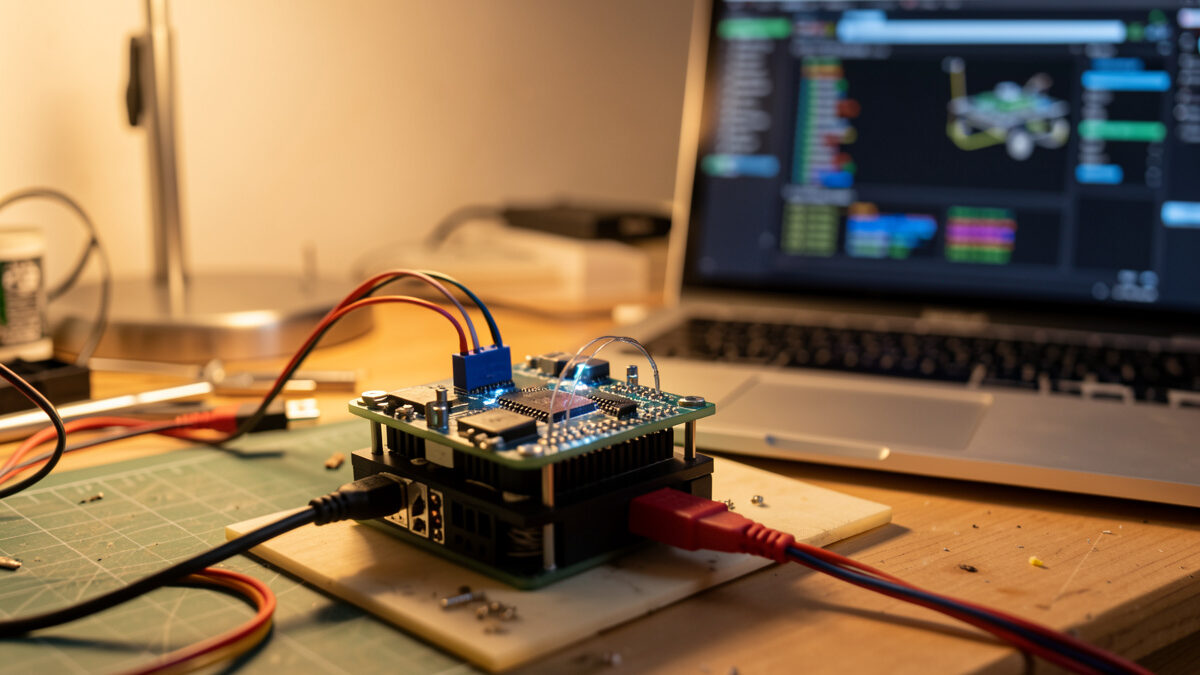
The flight controller and ESC are the brains and muscles of the quad, and they survive most crashes precisely because they sit cushioned in the center of the frame. When one does die, the failure is usually dramatic — magic smoke, a dead board, or a quad that simply will not power up. The good news is that the actual swap is methodical bench work, and the single thing that makes or breaks it is how well you documented the wiring before you touched the iron.
FPV electronics come in two layouts: a separate flight controller and ESC stacked together, or an all-in-one (AIO) board that combines both. Which you have decides what you replace and what it costs. A separate-stack build lets you replace just the dead board; an AIO means swapping the whole unit even if only the ESC half failed.
Knowing your layout before a failure saves money and time. Here is how the common options compare.
| Layout | What it is | If it fails | Rough cost |
|---|---|---|---|
| FC + ESC stack | Two stacked boards, FC on top | Replace only the dead board | $18–$35 per board |
| AIO board | FC and ESC combined on one board | Replace the whole unit | $30–$55 |
| FC + 4-in-1 ESC | FC plus a single 4-channel ESC | Replace the failed half | $20–$40 per half |
| Whoop AIO | Tiny combined board for sub-100g | Replace the whole unit | $25–$45 |
For most 5-inch freestyle quads the separate FC-plus-4-in-1-ESC stack is the standard, and it is the most repair-friendly because a fried ESC does not also cost you the flight controller. Whoops and micros lean on AIO boards where the trade is simplicity for repairability.
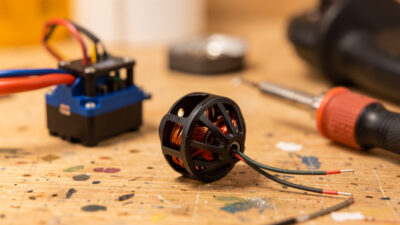
Before ordering a replacement, confirm which board is dead so you do not replace a healthy one. A scorched or smelly ESC with the FC still lighting up on USB means the ESC died; a board that gives nothing at all on USB and no LEDs points at the FC or its voltage regulator. The smell and the burn mark usually point straight at the culprit.
Plug the FC into USB alone (no battery) and watch for LEDs and whether the computer detects the board in Betaflight. If the FC boots on USB, it is alive — the fault is downstream in the ESC or wiring. If it is dead on USB, the FC or its regulator is gone. Look and smell, too: a blackened FET on the ESC or a burnt regulator on the FC is a visible verdict. For the broader “nothing powers up” case, work through my won’t-arm diagnosis guide first, because a torn power lead can masquerade as a dead board and is a five-cent fix, not a stack swap.
A replacement board has to match three things: the mounting pattern, the voltage rating, and enough UARTs and pads for your gear. Mounting pattern is the hole spacing — 30.5mm by 30.5mm is the 5-inch standard, 20mm by 20mm is common on smaller builds. Get the voltage rating wrong and you cook the new board on first power-up.
Check that the new board’s voltage rating covers your battery cell count — a 6S build needs a board rated for 6S, and feeding 6S into a 4S-only board is an instant repeat failure. Confirm the mounting holes match your frame so the stack bolts in without adapters, and count your UARTs: you need enough serial ports for your receiver, VTX, and any GPS or smart-audio. Matching the new ESC’s amp rating to your motors matters too, so the ESC is not running at its limit. When in doubt, replacing with the same model you had removes all the guesswork — keep the board’s spec in your build manifest for exactly this moment, the same way I plan it in the FC and ESC stack guide.
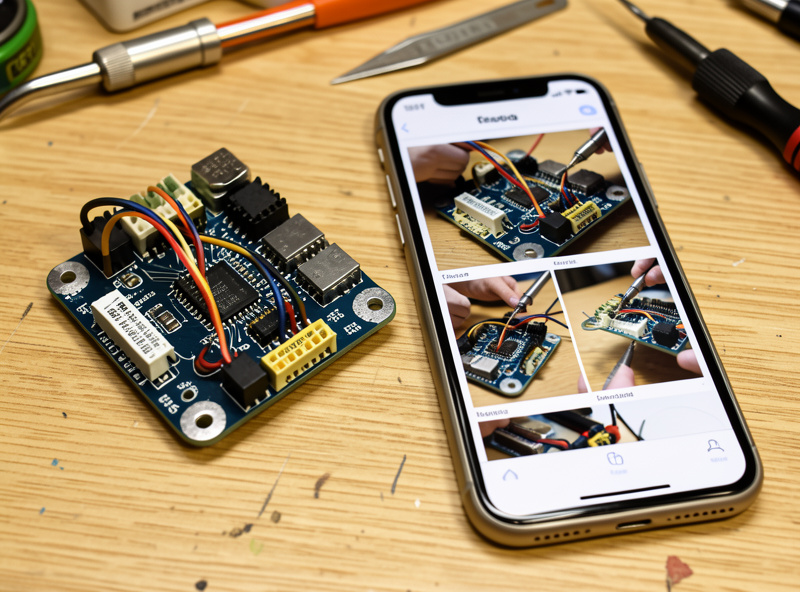
The entire difficulty of a stack swap is wiring memory, and the fix is a camera. Before you desolder a single wire, photograph the old board from every angle with the wires attached, and note which wire goes to which pad. That phone photo is your wiring diagram for the rebuild — skip it and you are reverse-engineering your own quad.
With the board documented, desolder each wire from the old FC by heating the pad and lifting the lead as the solder flows. Remove the dead board, mount the new one with soft mounts in the same orientation (note the arrow that marks the front), and re-solder each wire to the matching pad on the new board using your photos as the map. Work one wire at a time and check it off your photo as you go, so nothing is forgotten or crossed. Clean technique matters here more than anywhere — the heavy battery leads and the fine signal wires both have to land clean, and the full method is in my soldering repair guide. If you lift a pad on the old or new board, that is a separate rescue, also covered there.
A new flight controller arrives with stock firmware and none of your tune. If you saved a Betaflight “diff all” dump before the crash, restoring is a paste-and-go; if you did not, you rebuild the config from scratch. This is why I dump my config to a text file after every successful tuning session — it turns a stack swap from an evening of setup into a two-minute paste.
Flash the new board to the Betaflight firmware target that matches it, then either paste your saved diff in the CLI or set up ports, modes, and rates fresh. Be careful pasting a diff from a different board target — board-specific resource and pin assignments will not carry over and can misconfigure the new FC, so review the diff rather than blindly pasting all of it. Re-bind your receiver, re-check your VTX and smart-audio, and confirm your modes (arm, flight modes, beeper) are mapped. A clean config restore is the difference between flying tonight and a frustrating evening, and it is one of the habits that keeps the hobby cheap, alongside the broader lessons in avoiding expensive beginner mistakes.
Never plug a freshly soldered stack straight into a battery. Use a smoke stopper — a current-limiting device — for the first power-up so a wiring mistake trips it instead of frying the new board. If the smoke stopper stays calm, you have no short; if it lights up, you have a bridge to find before you go further.
Once the current-limited power-up is clean, do a USB check in Betaflight, confirm the board is detected and the gyro reads level, then move to a props-off motor test exactly as you would after a motor swap. Verify each motor spins the right direction, the receiver binds, and the failsafe cuts the motors before you ever fit a prop. Only then does the quad earn a low hover over grass. This props-off, smoke-stopper-first sequence is the same discipline that runs through my whole crash repair process — the repair is finished when the safety checks pass, not when the soldering looks done.
Plug the FC into USB with no battery. If it lights up and Betaflight detects it, the FC is alive and the fault is in the ESC or wiring. If it is dead on USB with no LEDs, the FC or its voltage regulator failed. A burnt FET on the ESC or a scorched regulator on the FC is often a visible verdict.
On a separate FC-plus-ESC stack you replace only the dead board, which saves money. On an all-in-one AIO board the FC and ESC are combined, so a failure of either half means swapping the whole unit. Check which layout you have before ordering a replacement.
Three things: the mounting pattern such as 30.5mm by 30.5mm, the voltage rating covering your battery cell count, and enough UARTs and pads for your receiver, VTX, and accessories. Feeding 6S into a 4S-rated board is an instant repeat failure, so the voltage match is critical.
Photograph the old board from every angle with the wires still attached before you desolder anything. That photo is your wiring diagram. Re-solder one wire at a time to the matching pad on the new board, checking each off the photo as you go so nothing is crossed or forgotten.
Yes, a new board ships with stock firmware. If you saved a diff all dump before the crash you can paste it back in minutes, though review it rather than blindly pasting a diff from a different board target. If you did not save one, you rebuild ports, modes, and rates from scratch.
FPV frame repair is mostly about knowing the line between a fixable frame and a…
An FPV drone that won’t arm is almost never broken — it is being prevented…
Replacing an FPV motor is a 30-minute job: confirm the motor is actually dead, match…
Leave a Reply