Buy the FPV Controller Before the Drone: Here Is Why
I’m going to defend a piece of advice that sounds completely backwards to every newcomer:…
Every few months a message lands in my inbox that reads almost word for word the same: “I bought a 5-inch FPV freestyle quad off a YouTube build list, crashed it into a tree on the second flight, and now I’m scared of the whole hobby.” That message is the reason this guide exists. Learning how to get into FPV the right way is less about which drone you buy first and far more about the order you do things in. Get the order right and FPV is the most addictive, rewarding hobby I’ve ever picked up. Get it wrong and it’s an expensive way to feed trees carbon fiber.
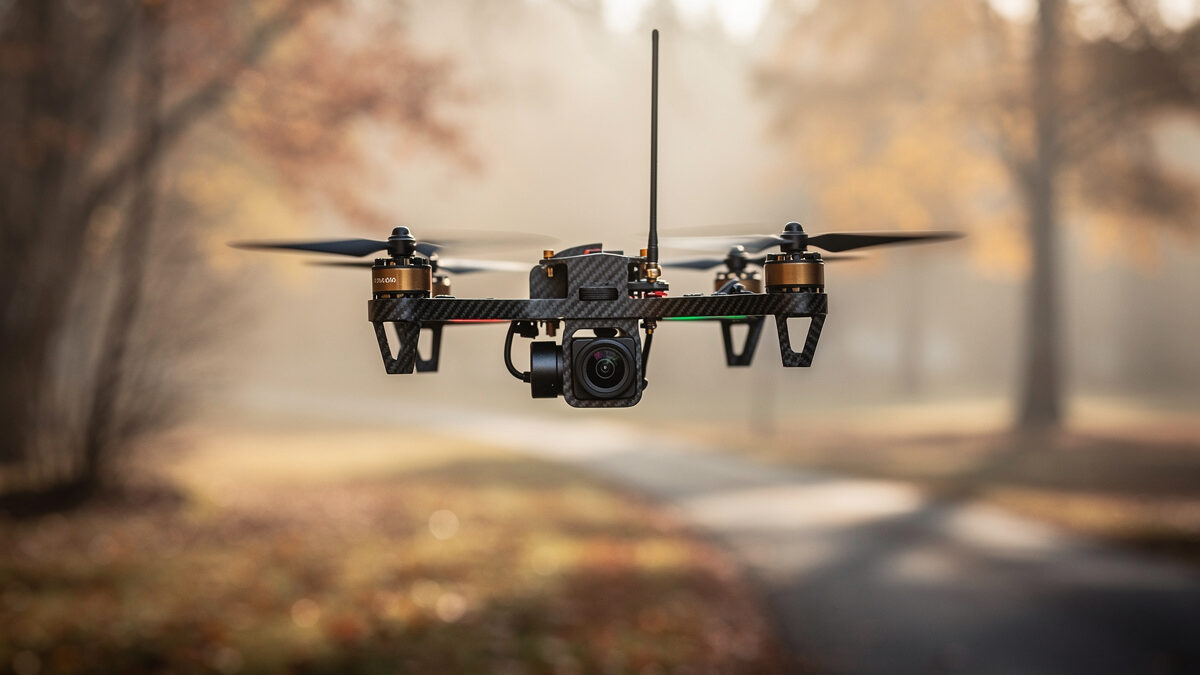
I fly both halves of the drone hobby. I have sub-250g camera drones for the Swedish landscape light, and on the FPV side I run a tinywhoop fleet through the dark Nordic winters, a 3.5-inch cinewhoop-class build, and a 5-inch freestyle quad I soldered together myself on my own bench. I’ve also logged a frankly embarrassing number of hours in FPV simulators. So when I tell you the entry path, I’m not theorizing — this is the route I actually flew, the route I now coach every beginner who asks me onto, and the one that would have saved me a small fortune in spare arms if someone had drawn it for me on day one.
Here it is, the whole doctrine, distilled: simulator first, cheap radio second, tinywhoop third, everything else later. If you internalize nothing else from this page, internalize that sequence. It inverts the order almost every beginner takes — which is to buy the most impressive-looking quad first and learn to fly it never — and it is the single biggest predictor of whether you’ll still be flying in six months or have quietly sold your gear at a loss on a marketplace.
The logic is simple. FPV flying is a motor skill, and motor skills are built through thousands of repetitions. The cheapest, safest, most repeatable place to get those repetitions is a simulator where crashes cost nothing and a reset is one button away. Real hardware is where you spend your repetitions once you’ve already built the reflexes. People who skip the sim aren’t saving time — they’re paying for their reps in broken props, stripped motors, and the demoralizing experience of failing in public.
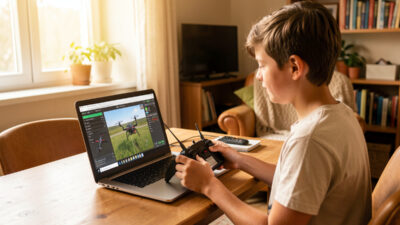
I call sim time the cheapest crash insurance ever sold, and I mean it literally. A good FPV simulator costs about the price of a couple of sets of props. The radio you buy to fly it is the same radio you’ll use to fly real quads for years. And the hours you put in translate almost directly to stick skill in the air. I tell every beginner the same number I held myself to: get comfortable in the sim before you ever arm a real quad with the props on. Not because there’s a magic threshold, but because the sim is where you learn that a quad in acro mode does exactly what you tell it and absolutely nothing it doesn’t — which is a terrifying lesson to learn for the first time with spinning carbon near your face.
What you’re actually drilling in the sim:
Every one of those skills is free in the sim and expensive in the air, which is the whole argument for putting in the simulator hours before your first flight. It’s also why the very first thing I tell anyone shopping is to stop looking at quads and start looking at a radio they can plug into a sim tonight.
I go deep on exactly how much sim time pays off, and why, in my dedicated piece on how many FPV simulator hours you need before flying — it’s the single most important habit in this entire path.
One thing beginners ask constantly: which simulator? The honest answer is that the differences matter less than the hours, but they aren’t zero. The best sims have flight physics close enough to real quads that the muscle memory transfers cleanly, plenty of maps to keep you engaged, and a feel that doesn’t fight you while you learn. A sim that flies nothing like a real quad will actively teach you bad habits. I’ve run the major titles side by side and have strong opinions about which ones earn their place on your drive — I lay them out in my honest breakdown of the best FPV simulator for 2026. Pick one, then stop shopping and start flying. The hours are the product, not the software.
A practical note on how to actually practice: don’t just bomb around. Set yourself drills. Fly figure-eights around two trees. Practice power loops over a single gate until they’re smooth. Do a full session of nothing but orientation flips — flip the quad, recover, flip again. Aimless flying is fun but it plateaus fast; deliberate practice in the sim is what compresses months of real-world learning into a couple of weeks of evenings on the couch.
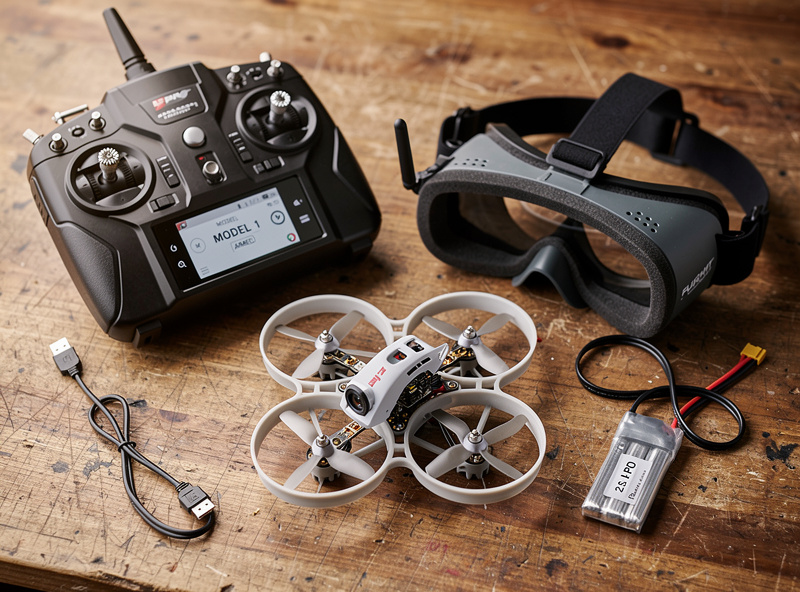
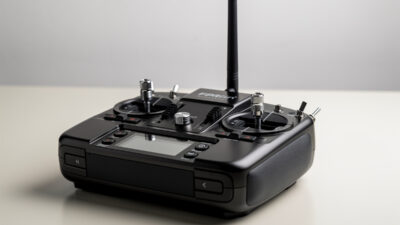
This is the step that feels backwards to every beginner and it’s the one I’ll defend hardest. Your first real purchase should be the radio transmitter — the controller — not the drone. Here’s why: the radio is the one piece of gear that outlasts everything else in your kit. Quads come and go, you crash them, you upgrade them, you build new ones. The radio in your hands stays the same for years. It’s also what plugs into your computer to fly the simulator, so buying it first means step one and step two are the same purchase.
A good radio with hall-sensor gimbals — the magnetic kind that don’t wear out or drift like cheaper potentiometer gimbals — is the foundation everything else binds to. Buying a cheap throwaway radio “just to start” is a false economy I see constantly; you outgrow it in weeks and re-buy. I make the full argument, including which gimbal type matters and why, in why you should buy the FPV controller before the drone. Spend here. This is where your money is best deployed on day one.
There’s a second reason the radio comes first that nobody mentions to beginners: the radio protocol you choose ripples through everything you’ll ever build or buy. The hobby has largely standardized on ExpressLRS (ELRS) for the control link — it’s open, cheap, long-range, and the receivers cost almost nothing. Buying a radio with ELRS built in (or easily added) means every future quad, from your tinywhoop to a long-range build, binds to the same transmitter. A radio with hall-sensor gimbals and ELRS is the single most future-proof purchase in the entire hobby. Get that right once and you stop thinking about it for years.
When you finally buy hardware that flies in the real world, it should be a tinywhoop — a tiny, ducted, sub-30-gram quad you can fly inside your living room. I know the 5-inch freestyle quads in the thumbnails look infinitely cooler. I own one. It is not your first quad.
If you only read one of the deeper guides before spending money, make it the tinywhoop case — it’s the step beginners most want to skip and most regret skipping. The tinywhoop is the right first quad for reasons that all compound:
I make the complete case in why your first FPV quad should be a tinywhoop. The short version: it’s the bridge between the sim and the sky, and skipping it is the most common expensive mistake in the hobby.
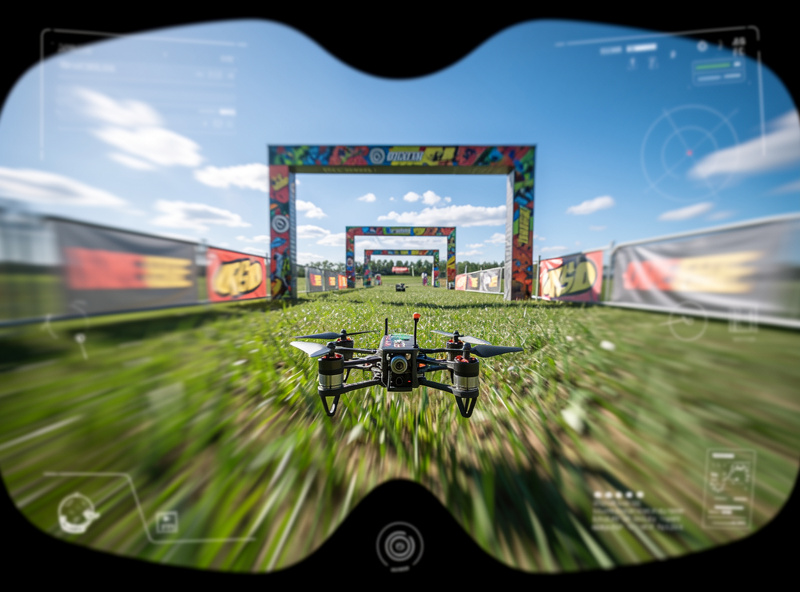
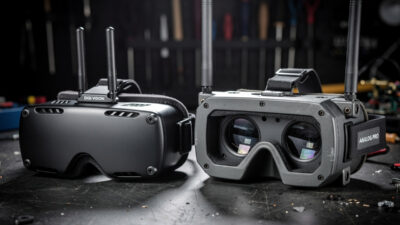
Somewhere around buying your goggles and video system, you hit the question that splits the whole hobby: analog or digital? Digital FPV gives you a gorgeous, crisp, near-HD image in the goggles. Analog gives you a fuzzy, static-laced picture that looks like a 1990s camcorder — but it’s cheaper, lighter, lower-latency, and it degrades gracefully (it gets snowy before it cuts out, where digital can drop to a black screen at the edge).
I own both systems specifically so I can answer this honestly, and the answer for a beginner is more nuanced than “digital is better so buy digital.” It depends on your budget, what you want to fly, and how much you value crash-resistance in cheap gear versus image quality. I lay out the full decision — with the real tradeoffs from flying both — in analog vs digital FPV for beginners.
I’ve made most of the expensive mistakes myself, and I’ve watched beginners make the rest. The pattern is so consistent I wrote a whole piece on it: the expensive FPV beginner mistakes that cost people the most money and the most motivation. The big ones, in brief: buying the 5-inch first, skipping the sim, buying a disposable radio, neglecting LiPo care until a battery puffs, and trying to fly real acro before the reflexes exist. Every one of those is avoidable, and avoiding them is most of what this guide is for. If you want the order argument made in full — radio before quad, every time — I make it in the controller-first piece, because it’s the mistake that quietly causes the most re-buying.
Here’s the whole path laid out side by side, so you can see the order, the rough cost weighting, and why each step exists:
| Step | What you buy | Why it comes here | Skip it and… |
|---|---|---|---|
| 1. Simulator | Sim software (radio doubles as controller) | Build reflexes where crashes are free | You pay for reps in broken hardware |
| 2. Radio | Hall-sensor transmitter | Outlasts every quad; flies the sim too | Outgrow a cheap radio in weeks, re-buy |
| 3. Tinywhoop | Sub-30g ducted quad + charger | Cheap, safe, indoor, real acro skills | Crash an expensive quad while learning |
| 4. Goggles/VTX | Analog or digital system | The image link to your quad | Buy the wrong system twice |
| 5. Bigger quads | 3.5-inch, then 5-inch freestyle | Earn these with built skills | The original tree-crash horror story |
Beginners want a timeline, so here’s an honest one with the caveat that it depends entirely on how much you fly. If you put in regular sim sessions — say a handful of evenings a week — you can be flying a tinywhoop confidently indoors within a few weeks. From there, moving to a 3.5-inch cinewhoop-class quad outdoors is a matter of comfort more than calendar; you’ll know you’re ready when crashes feel like mistakes you understand rather than random catastrophes. Reaching for a 5-inch freestyle quad — the kind I built on my bench — is realistically a few months out for most people, and that’s fine. The pilots who rush this step are exactly the ones who write me the tree-crash emails.
The thing nobody tells you is that the plateau between “can keep it in the air” and “can fly it where I want with intent” is the longest stretch, and it’s where the sim earns its keep all over again. When the weather’s bad or you’re between quads, the sim keeps your reflexes sharp. Understanding how a sub-250 handles wind also shapes when to fly and when to wait. I still fly the sim regularly, years in, for exactly that reason. It never stops being useful.
Half of saving a beginner’s money is telling them what to skip. So here’s my “not yet” list — gear that’s genuinely great but that a beginner does not need on day one and will buy better once they know what they actually fly:
Everything on that list is something I own and use happily. None of it belongs in your first month. The discipline of buying in the right order is, genuinely, most of what separates the people who thrive in this hobby from the people who fund it and quit.
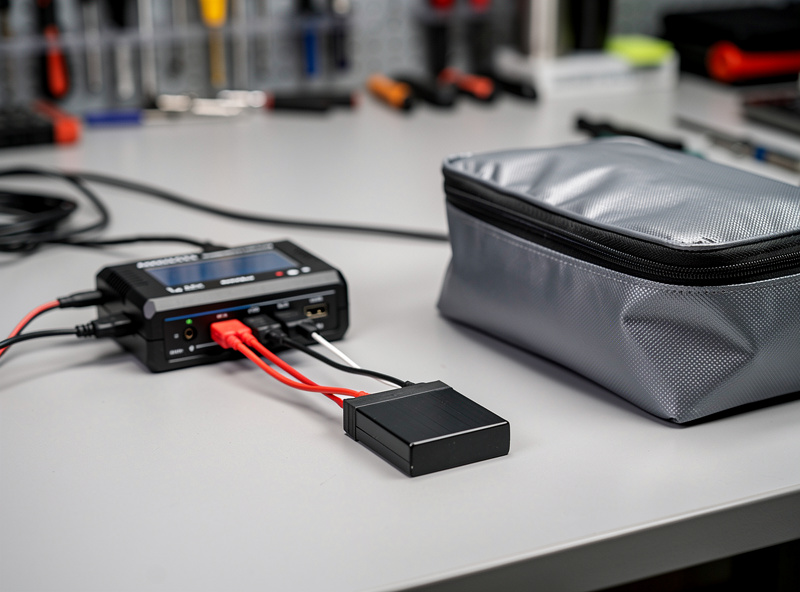
I won’t teach you to build battery packs — that’s not beginner content and frankly it’s not safe content to hand someone on day one. What I will hand you on day one is the care doctrine, because LiPo habits are the difference between a hobby and an insurance claim. The whole of it for a beginner fits in a few non-negotiables:
That’s the entire battery conversation a beginner needs, and it’s all habit, never modification. Treat your packs like the small chemical hazards they are and they’ll treat you well.
I fly in the EU, under the open-category rules administered by EASA, and I treat regulatory compliance as part of the hobby rather than an annoyance bolted onto it. For anyone starting out in the EU, the essentials are straightforward enough to learn before your first outdoor flight: most beginners register as a drone operator, fly in the open category, and respect the subcategory rules (the A1/A3 framework) about distance from people. The sub-250-gram weight class exists precisely because it sits in the friendliest part of those rules — one more reason the entry path leans light.
I’m an EU operator, so I won’t pretend to give you US Part 107 advice as lived experience — that’s a different framework run by the FAA, and if you’re flying in the US you should read it from the source rather than from me. Wherever you fly, the principle is identical and non-negotiable: find your national aviation regulator, read the open-category rules for yourself, and fly inside them. I’ll point you at the regulator; I won’t hand you a shortcut around it, because there isn’t one and there shouldn’t be.
I want to close the doctrine with the honest emotional truth, because the step-by-step can make it sound clinical. The first time the orientation clicks in your goggles — the first time the quad stops being a confusing object in the sky and becomes an extension of your hands — is genuinely one of the best feelings this hobby offers. It’s flying. Actual, three-dimensional, you’re-in-the-cockpit flying, for the price of a hobby instead of a pilot’s license.
The path above exists to get you to that feeling as fast and as cheaply as possible, and to make sure that when you get there you’ve still got money left to enjoy it. Sim first. Radio second. Tinywhoop third. Build the reflexes before you buy the dream quad, treat your batteries like an adult, and read your own country’s rules. Do that and the trees of your local park will go hungry.
I’m going to defend a piece of advice that sounds completely backwards to every newcomer:…
You can learn the entire foundation of FPV flight for exactly zero kronor. Free FPV…
Somewhere early in the hobby every newcomer hits the fork that splits the whole of…
Leave a Reply