FPV Drone Wont Arm? A Step-by-Step Diagnosis
An FPV drone that won’t arm is almost never broken — it is being prevented…
Replacing an FPV motor is a 30-minute job: confirm the motor is actually dead, match a replacement by stator size and KV, solder three leads, and set the direction in Betaflight. A replacement 5-inch motor runs about $12 to $20, and matching the original spec matters far more than chasing a brand.
Motors are the second most common thing I replace after arms, almost always because a bearing ate grit on a grass or dirt landing. The trap beginners fall into is replacing a motor that was never broken — the real fault was a damaged ESC signal wire or a desync in the tune. So this guide starts with the test that tells you whether the motor is genuinely dead before you spend a cent, then walks the full swap from desolder to props-off spin test.
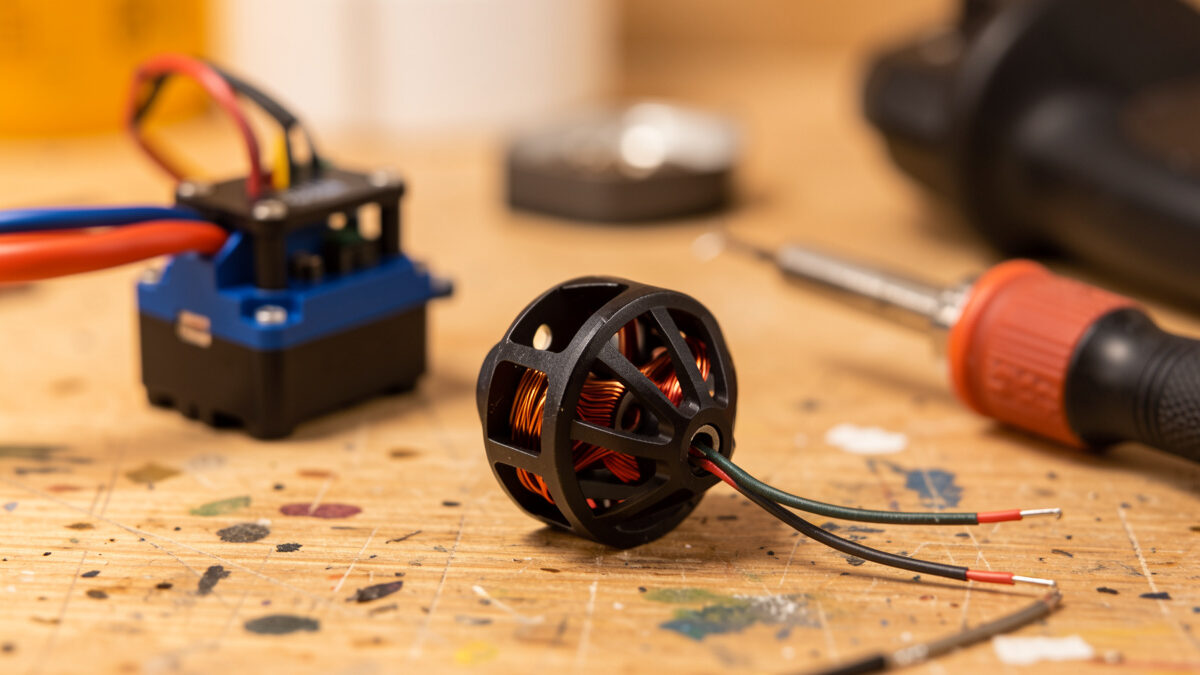
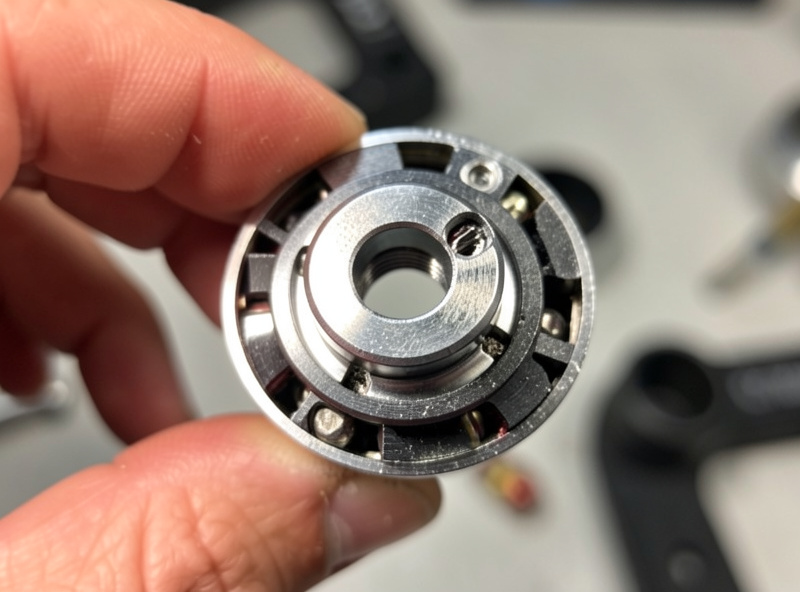
Before replacing anything, run a three-part bench test: spin it by hand, wiggle the bell, and cross-check the Betaflight motor tab with props off. A motor that spins smoothly by hand and runs clean in the configurator is fine — your fault is elsewhere. A grinding, notchy, or seized spin is a dead bearing and a genuine replacement.
Spin each motor with a finger: smooth and free is healthy, gritty or notchy means bearing damage, and a stiff or seized bell means it is done. Then grab the bell and wiggle it side to side; noticeable play means the bearings are shot. Finally, in Betaflight’s motor tab with props removed and the quad on the bench, spin each motor individually at low throttle and listen — a healthy motor spins clean, a damaged one stutters, screeches, or refuses to spin. Use the table below to turn the symptom into an action so you fix the cause, not just the symptom.
| Symptom | Likely cause | Action |
|---|---|---|
| Grinding or notchy by hand | Grit in the bearings | Replace motor (or re-bearing if you know how) |
| Bell wobbles with side play | Worn or damaged bearings | Replace motor |
| Spins clean by hand, desyncs in flight | Damaged ESC signal wire or ESC fault | Check wiring, not the motor |
| One motor won’t spin, others do | Broken motor lead or solder joint | Re-solder the lead first |
| Hot motor after short hover | Bent bell rubbing, or wrong motor timing | Inspect bell; replace if bent |
| Screech on spin-up, then stops | Seized bearing | Replace motor |
A replacement motor must match the original’s stator size and KV rating, or your quad flies unevenly and the tune fights itself. Stator size is the four-digit number on the motor (a 2207 is 22mm wide by 7mm tall); KV is the rpm per volt. Mixing a single odd motor into a set of four introduces vibration the gyro has to constantly correct.
Read the original spec off the motor or your build’s parts manifest. For a 5-inch freestyle quad, 2207 motors in the 1700KV to 2000KV range are the common ground, but match what you already fly — if three motors are 1900KV and you bolt on a 2400KV, that corner pulls harder and the quad will never trim out clean. When a single motor dies I prefer to replace it with the exact same model to keep all four matched, which is why I keep a matched spare on the bench. If you cannot get the identical motor, matching stator size and KV closely is the priority; a search for 2207-class FPV motors in your KV range will surface compatible options. As an Amazon Associate I earn from qualifying purchases.
Motors connect one of two ways: soldered directly to the ESC pads, or through a small plug. A plugged motor is a 30-second swap — unplug, unbolt, rebolt, plug in. A soldered motor means desoldering three leads from the ESC, which is where a little iron skill pays off.
Unbolt the dead motor from the arm first (usually four M3 screws), then deal with the wires. If your build uses motor plugs, you are done in seconds. If the leads are soldered to the ESC, heat each of the three pads with a well-tinned iron and a touch of flux, and lift the wire free as the solder flows — do not yank a cold joint, because that is how you rip a pad off the ESC and turn a $15 motor job into a stack replacement. Clean the pads with desoldering braid so they are flat and ready for the new leads. The full technique for clean joints and pad rescue lives in my soldering repair guide.
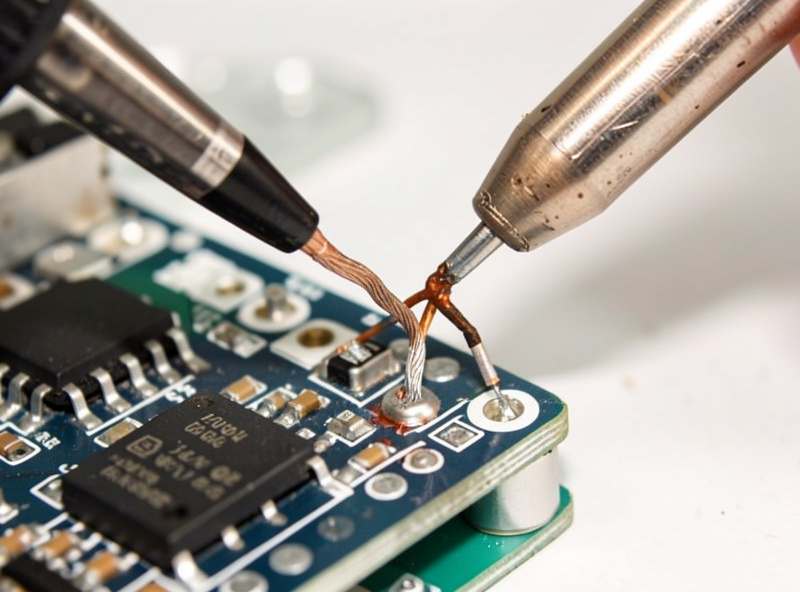
The three motor wires can connect to the three ESC pads in any order — the wire order only changes spin direction, which you fix in software, not by re-soldering. Tin each pad and each wire end, then heat the pad and let the tinned wire flow in. A good joint is shiny and slightly domed; a dull, blobby joint is a cold joint waiting to fail.
Bolt the new motor to the arm with thread-locker on the screws, route the leads so they cannot reach the props, and solder them onto the three cleaned pads. Because direction is set in software, do not waste time trying to “match” the wire colors to the old motor — just make three clean joints. Keep the screw length correct, too: a motor screw that is too long can bite into the windings and short the motor instantly, which is one of the most common self-inflicted motor failures. After soldering, reflow any joint that looks dull and confirm none of the three pads bridge to each other.
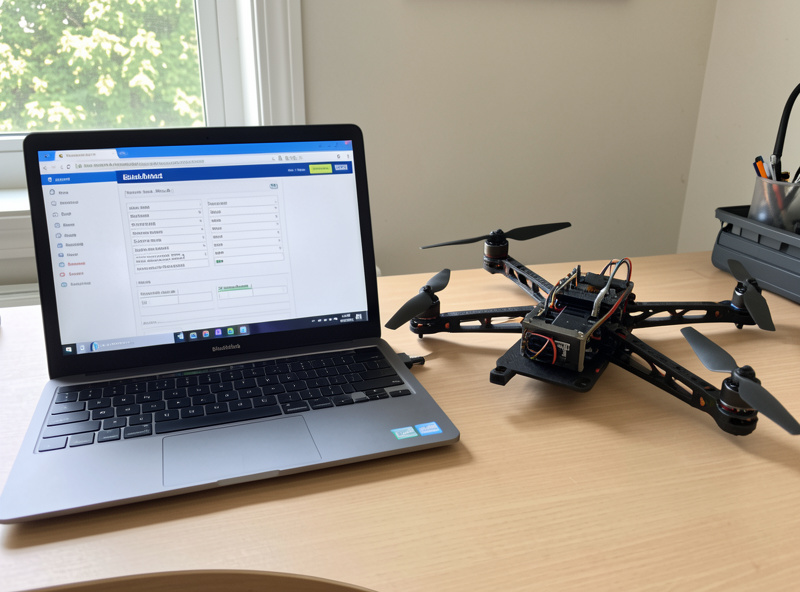
With the motor wired, the last step is confirming spin direction in Betaflight‘s motor tab — props off, every time. If the new motor spins the wrong way, you reverse it in software (in the configurator or via a BLHeli/Bluejay setting) rather than re-soldering. Flying with one reversed motor makes the quad flip on takeoff.
Connect the quad to Betaflight, remove every prop, and use the motor tab to spin the replaced motor at low throttle. Confirm it spins the correct direction for its position in your “props in” or “props out” layout; if it is backwards, reverse that motor’s direction in software and re-test. Only once the direction is correct and the motor spins clean do you remount props and do a low hover over grass. This props-off discipline is the same one I bring to every fresh build and every repair — it is the cheapest insurance against a quad that flips into your face on the first arm. If anything refuses to spin at this stage, jump to the won’t-arm diagnosis guide.
The number-one motor killer is grit, not crashes. Landing in grass, sand, or dirt works abrasive particles into the bearings, and a few gritty landings end a motor faster than a hard impact. The fix is habit: land on hard, clean surfaces when you can, and blow grit out of the bells after dusty sessions.
Beyond grit, the common causes are bent bells from impacts, over-long mounting screws cutting the windings, and wires chafing through to short. None of those are bad luck — they are preventable with a clean landing spot, correct screw length, and tidy lead routing. A motor that is cared for easily outlasts the frame it is bolted to. When you do have the quad apart for a motor, run the full crash triage and check the arm it mounts to, because a cracked arm and a struggling motor often travel together after the same impact.
Spin it by hand. Smooth and free means it is healthy and the fault is elsewhere. Gritty, notchy, or seized means a damaged bearing and a replacement. Cross-check Betaflight’s motor tab with props off: a clean motor spins smoothly, a dying one stutters or screeches.
No. The three motor leads can go to the three ESC pads in any order. Wire order only changes the spin direction, which you correct in software in Betaflight or a BLHeli setting, never by re-soldering. Just make three clean, shiny joints and set direction with props off.
Match the original stator size and KV rating. The stator size is the four-digit number on the motor, such as 2207, and KV is rpm per volt. For a matched set, replace with the same model if you can; otherwise match stator size and KV closely so all four motors pull evenly.
A single 5-inch class motor runs about $12 to $20, and the swap takes around 30 minutes including soldering. Keeping a matched spare on the bench means a dead motor is a same-night fix rather than a week waiting on parts.
Grit is the top killer. Landing in grass, sand, or dirt works abrasive particles into the bearings and ends a motor faster than crashes do. Other causes are bent bells from impacts and mounting screws that are too long and cut the windings. Land clean and use correct screw length.
You can replace just one, but match it to the others by stator size and KV. A single mismatched motor pulls harder or softer than the rest and the quad will never trim out clean, forcing the gyro to constantly correct. Keeping a matched spare avoids this entirely.
An FPV drone that won’t arm is almost never broken — it is being prevented…
Replacing an FPV flight controller stack is the repair people fear most, but it is…
An FPV repair starts before the soldering iron: triage the crash first, then fix what…
Leave a Reply