FC Stack Replacement Guide for FPV Drones
Replacing an FPV flight controller stack is the repair people fear most, but it is…
An FPV repair starts before the soldering iron: triage the crash first, then fix what is actually broken. In my own rebuilds, roughly four out of five “destroyed” quads need only a new arm, a motor, or a re-flow — parts under $30, not a new build.
I have crashed more quads than I care to admit, and the single most expensive habit in this hobby is panic-buying a whole new airframe when a $6 arm and twenty minutes on the bench would have flown again by the weekend. This guide is the triage-to-rebuild map I actually follow at my soldering station: how to read the wreck, how to decide fix-versus-replace-versus-retire, and where each specific repair lives. It is built from logged crashes on my own 5-inch freestyle quad and the cinewhoop, not from an unboxing table.
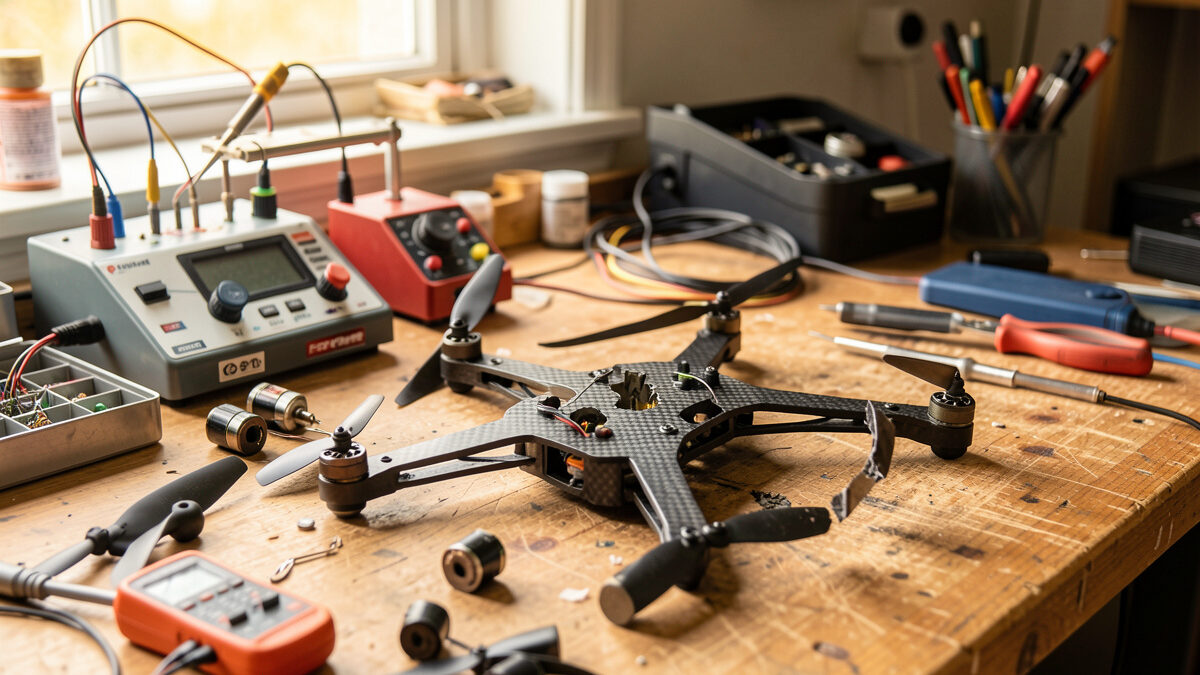
Before I plug in a battery or reach for the iron, I run a fixed inspection: smell, sight, spin, wiggle, power. It takes five minutes and it stops you from arming a quad with a shorted ESC and finishing the job the crash started.
Smell the quad first — a hot, sweet electrical smell means something cooked, usually an ESC or the VTX. Look for blackened components and melted heat-shrink. Spin each motor by hand; a grinder, a notch, or a stiff bind tells you grit or a bent bell. Wiggle every arm and the camera; carbon that flexes where it should be rigid is cracked through. Only then do I do a smoke-stopper power-up with the props off — a current-limited first power is the cheapest insurance on the bench. If current spikes or anything gets warm, you have a short, and arming it would turn a $6 repair into a board replacement.
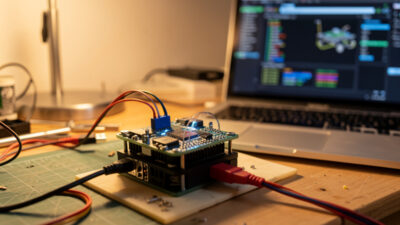
The wreck shows you the mechanical damage; the Betaflight blackbox log shows you the electrical story. Read both before you commit to a fix. A motor that desyncs in the log but spins clean by hand is often a damaged ESC signal wire, not a dead motor — replacing the motor would leave the real fault in place.
I pull the log and look at the last half-second before impact: did a motor output flatline (likely ESC or motor lead), did the gyro clip and the quad tumble (a tune or prop issue, not damage), or did everything cut at once (a battery eject or a main-lead tear)? Cross-referencing the log against the physical wreck is how you avoid the classic mistake of throwing parts at a symptom. My full walkthrough for the no-power-up case lives in the won’t-arm diagnosis guide, because “dead on the bench” is its own diagnostic tree.
Every crashed part falls into one of three buckets: a clean fix, a part swap, or a retirement. The deciding factors are whether the damage is structural, whether the part is a wear item, and whether the repair costs more in time and parts than a replacement. Carbon that has delaminated is a retirement; a snapped arm on a unibody frame with replaceable arms is a $6 swap.
Here is the matrix I use at the bench. Costs are rough street prices for 5-inch class parts and exist to set expectations, not to quote a receipt — your exact parts will vary by brand and supplier.
| Damage found | Most common cause | Fix or replace | Rough parts cost | Deep-dive guide |
|---|---|---|---|---|
| Snapped or cracked arm | Direct impact on a tree or wall | Replace arm (or whole frame if unibody) | $6–$25 | Broken arm repair |
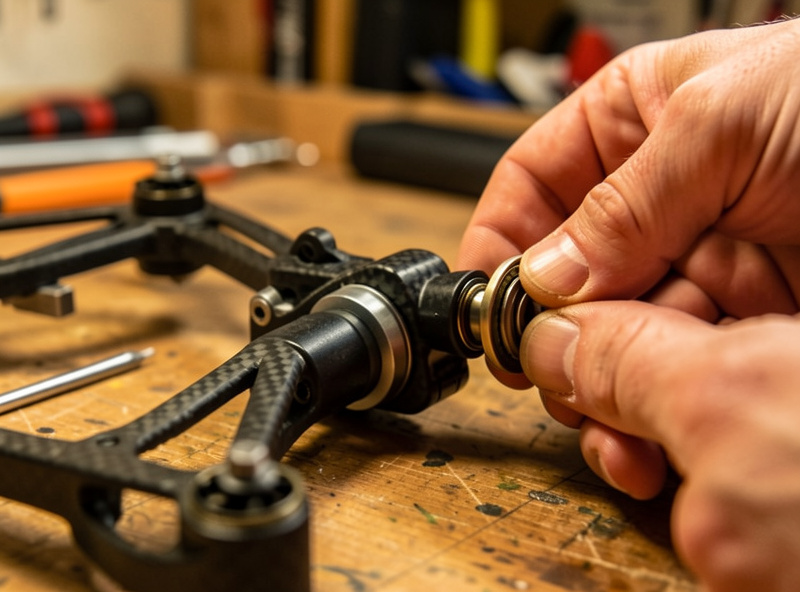
| Motor grinds or won’t spin | Grit in bearings or bent bell | Replace motor; clean if minor grit | $12–$20 each | Motor replacement |
| No video, hot VTX | Antenna detached in flight (transmit into open) | Often replace; sometimes re-solder antenna | $20–$45 | VTX repair vs replace |
| Won’t arm, no motor beeps | Torn main lead or cracked solder joint | Re-solder; replace stack if board cracked | $0–$40 | FC stack replacement |
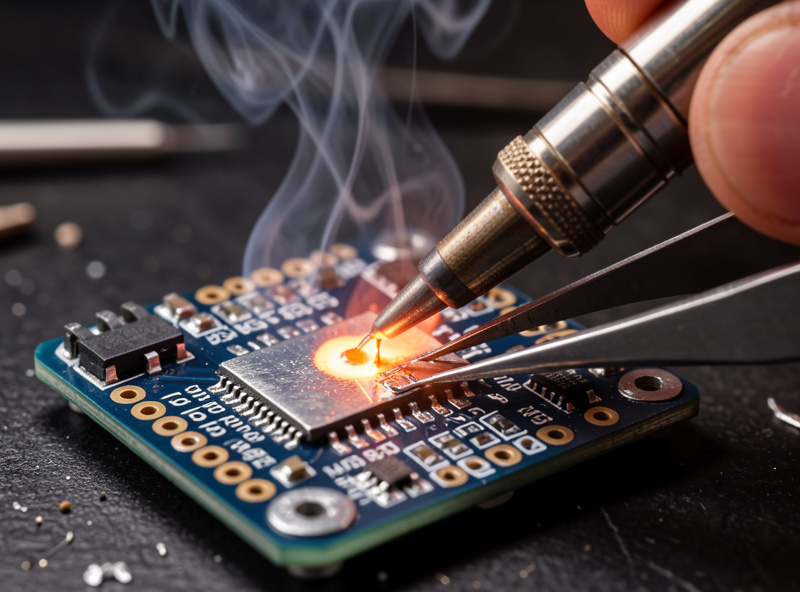
| Lifted solder pad | Wire ripped out on impact | Re-flow or jumper to via; replace if pad gone | $0–$5 | Soldering repairs |
| Delaminated carbon plate | Repeated hard impacts, fatigue | Retire the plate; reinforce the replacement | $15–$30 | Frame repair & reinforcement |
After enough rebuilds you learn that crash damage is not infinite — it clusters into the same handful of failures. Master these seven and you can return roughly 90% of crashed quads to the air without a new build. Each one has its own dedicated walkthrough; this hub is the map, those are the territory.
A snapped arm is the single most common 5-inch crash result, and on most modern frames it is a bolt-out, bolt-in job. Motor replacement is the next most frequent, usually because a bearing ate grit on a grass landing. The brains of the quad — the flight controller and ESC stack — survive most crashes but fail dramatically when they don’t, and knowing whether to re-solder or swap saves the most money. The video transmitter has one specific killer (transmitting with a detached antenna) and a clear repair-or-bin decision. Almost every fix on this list eventually routes through the iron, so my soldering repair guide is the skill that underpins all of it. When a quad simply will not come to life, the won’t-arm diagnosis tree finds the fault. And when the frame itself is the weak point, frame repair and reinforcement stops the same arm snapping in the same spot every Saturday.
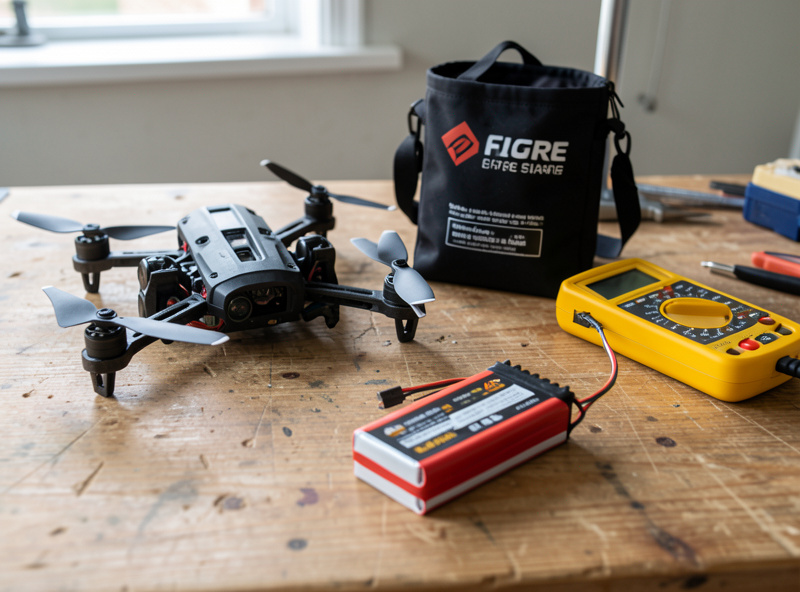
You do not need a lab. A temperature-controlled soldering station, good flux, a multimeter, a smoke stopper, and a small bin of spare arms, props, and motors will cover the overwhelming majority of crashes. The bench pays for itself the first time it saves you a $120 rebuild over a $6 arm.
My core kit is a 60-watt temperature-controlled iron set around 350°C for leaded solder, a brass-wool tip cleaner, a flux pen, fine 0.8mm leaded solder, a multimeter for continuity and short hunting, and a current-limiting smoke stopper for first power-ups. The consumable bin matters as much as the tools: keep spare props, at least one matched spare motor, and a spare arm for your main frame on hand, because the repair you can do tonight is worth ten you have to wait a week for parts on. If you want a sensible all-in-one starting point, an entry soldering station kit covers the iron, stand, and basic consumables in one box. As an Amazon Associate I earn from qualifying purchases.
If you are still assembling your first kit, the bench list I use for new builds doubles perfectly as a repair bench, and the beginner entry path explains why buying tools before the third quad saves real money.
The most dangerous moment in a crash is not the impact — it is the next ten minutes. A pack that took a hard hit can vent or ignite even if it looks fine. After any crash I disconnect and quarantine the battery in a LiPo bag before I do anything else, and I do not re-fly a pack that took a direct impact until it has sat, cool and observed, for at least twenty minutes.
A crashed LiPo is a separate risk from a crashed quad, and it deserves its own discipline. If a pack is puffed, dented, or smells sweet, it is retired — no heroics, as I cover in detail in the puffed LiPo guide. The broader habits that keep packs out of the bin in the first place live in my LiPo care guide and the battery-life routine. Repairing the quad is mechanical; respecting the battery is what keeps the hobby from becoming an insurance claim.
Most quads are repairable far longer than people think, but some damage is a genuine retirement. I bin an airframe when the main plate has delaminated (the carbon layers separate and it loses rigidity), when the FC board itself is physically cracked through a trace, or when the cost and hassle of repair exceeds a known-good replacement. Delaminated carbon never flies true again, no matter how it looks.
Everything else is usually a fix. A bent standoff, a torn wire, a lifted pad, a dead motor — those are bench problems, not funerals. The judgment that separates a repair from a retirement is experience, and the cheapest way to buy that experience is to attempt the repair before you condemn the part. The worst outcome of a failed re-solder is that you confirm what you suspected; the worst outcome of a premature bin is that you paid for a build you did not need.
Once the broken part is fixed, I do not just throw a battery in and rip. I run a fixed re-arm checklist: every screw torqued, every solder joint inspected under light, motor directions confirmed in Betaflight, props balanced and undamaged, and a props-off motor test before the first armed hover. The single most common post-repair failure is a prop spun up in the wrong direction after a motor swap.
This is the same props-off discipline I bring to every fresh build. Confirm motor order and direction in the configurator with props off, check that the receiver still binds and the failsafe still cuts the motors, and do a low hover over grass before you trust the repair at speed. The repair is not finished when the soldering is done — it is finished when the props-off test passes and the failsafe works. For the won’t-power-up cases that this checklist surfaces, route back through the diagnosis guide, and if you are newer to the bench, the expensive beginner mistakes piece will save you a few of mine.
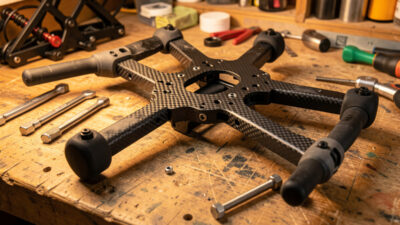
FPV quads do not break randomly — they break at predictable stress points, and knowing them turns a repair from a mystery into a checklist. The arms take the impact because they are the longest lever and the furthest point from the frame’s center, so a hit at the motor end multiplies force into the arm root. That is why arms snap at the joint near the body, not out at the tip.
The flight controller and ESC survive most impacts because they sit cushioned in the center of the stack on soft mounts, but their weak point is the solder joints where heavy wires meet the board. A crash does not crack the silicon; it cracks the joint where the battery lead was soldered, because that joint carries both the current and the mechanical shock. The camera and VTX antenna are the most exposed components, which is why a detached antenna is one of the most common post-crash faults — the antenna is sticking out into the world precisely so it can radiate, and that exposure is also what gets it caught and ripped. Once you understand that arms fail at the root, joints fail at the heavy wires, and antennas fail at the exposed tip, you stop guessing and start inspecting the places that actually fail. This is also the logic behind reinforcing a frame at its known weak points rather than everywhere.
The fastest way to waste money on FPV repairs is buying the wrong replacement part or buying one part at a time. I keep a written parts manifest for each of my quads — frame model and arm thickness, motor stator size and KV, FC and ESC mounting pattern, and prop size — so when something breaks I order the exact match without measuring twice. A 5-inch freestyle quad and a 3.5-inch cinewhoop do not share arms, motors, or props, and ordering the wrong one costs you a week.
Buy spares in the same order as the parts you already trust. If your build flies well on a particular motor, a matched spare keeps the quad balanced; mixing a single odd motor into a set of four can introduce vibration the gyro has to fight. The same logic applies to props — keep a deep stock because they are the cheapest part and the most frequently destroyed. When you do need replacement motors, matching stator size and KV to the originals matters more than chasing a brand, and a search for 5-inch FPV brushless motors in your quad’s spec range will surface the right options. Keep the receipts and part numbers in the same manifest, and the second repair is always faster than the first because you already know exactly what fits.
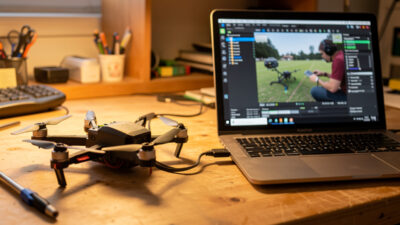
A crash camera fault is almost always one of three things: a cracked lens cover, a lens knocked out of focus, or a dead feed from a jarred connector. Before you condemn a camera, reseat its ribbon or plug — a loose connector mimics a dead camera far more often than the sensor itself fails, and reseating it costs nothing.
I judge a drone camera the way I judge any lens on the bench, and the symptoms separate cleanly. A feed that has gone soft and hazy but still shows an image is a focus shift, not damage — on an adjustable-lens FPV camera you loosen the tiny lens grub screw, turn the lens a few degrees while watching a known-good monitor, and lock it back at the sharp point. A front element that cracked in the impact scatters light into glare and washed-out flares even when focus is fine, and that is a lens or camera swap, not an adjustment. A genuinely dead camera gives a black or static-filled feed even after you have reseated the connector and confirmed it has voltage, and at $20 to $35 for a 5-inch class camera it is cheaper to replace than to chase. The one habit I never skip is reseating every connection in the camera’s signal path before writing it off — half my “dead camera” scares have been a plug shaken loose, not failed silicon.
Props are the cheapest part on the quad and the most commonly skipped post-crash check. A blade with a hairline crack or a chipped tip spins up looking fine, but it throws vibration the gyro fights for the whole flight — and that shows up as hot motors, a gray washed-out shimmer in the video, and a quad that never feels locked in no matter how clean the rest of the repair was.
Check every prop after a crash, not just the obviously shattered ones. Flex each blade, look hard at the hub for cracks radiating out from the shaft hole, and run a fingernail along the tips for chips. An imbalance out at the tip matters far more than a scuff near the hub because the force scales with the square of the rpm, so a chip you can barely feel becomes real vibration at 25,000 rpm. When in doubt, bin it — at well under a dollar a blade, a prop is never worth risking a fresh repair over, which is exactly why I keep a deep stock of my main prop both in the field bag and on the bench. A damaged prop is the single most common reason a quad that was rebuilt perfectly still flies rough and shows jello in the footage, so a props-off spin test followed by a slow hover, watching for vibration, is the last gate before I trust a repair at speed.
Almost always worth repairing. In my own rebuilds about four out of five crashed quads need only a new arm, motor, or a re-solder, costing under $30 versus $120 or more for a new build. Retire only when the carbon plate delaminates or the FC board cracks through a trace.
Spin it by hand. Smooth and free means it is probably fine and just needs grit cleaned out. A grinding, notchy, or stiff feel means a damaged bearing or bent bell, which is a replacement. Cross-check the Betaflight log: a motor that desyncs but spins clean is usually an ESC or signal-wire fault, not the motor.
Disconnect and quarantine the LiPo in a fire-safe bag before anything else, then run a five-minute inspection: smell for cooked electronics, look for blackened parts, spin each motor, wiggle every arm, and do a props-off current-limited power-up. Never arm a quad before confirming there is no short.
For arm and motor swaps on many modern frames, often no. But for the most valuable repairs, lifted pads, torn main leads, and stack faults, yes. A temperature-controlled iron, flux, and an hour of practice on a dead board covers most FPV repair soldering. It is the single highest-leverage skill on the bench.
The common causes are a torn or cracked main power lead, a cracked solder joint on the FC, a damaged receiver connection, or a Betaflight arming flag tripped by the crash. Work it as a sequence: confirm power reaches the FC, check the receiver link, then read the arming flags in the configurator. The full tree is in my won’t-arm diagnosis guide.
Not immediately. Quarantine it in a LiPo bag and observe it cool for at least twenty minutes. If it is puffed, dented, or smells sweet, retire it with no exceptions. A pack that took a direct impact can vent or ignite minutes later even when it looks intact.
Replacing an FPV flight controller stack is the repair people fear most, but it is…
An FPV drone that won’t arm is almost never broken — it is being prevented…
FPV frame repair is mostly about knowing the line between a fixable frame and a…
Leave a Reply